I am in charge of some of the desserts at Thanksgiving. Of course I always bring my chocolate haupia pie... and Kristy wanted me to make pumpkin dump cake.
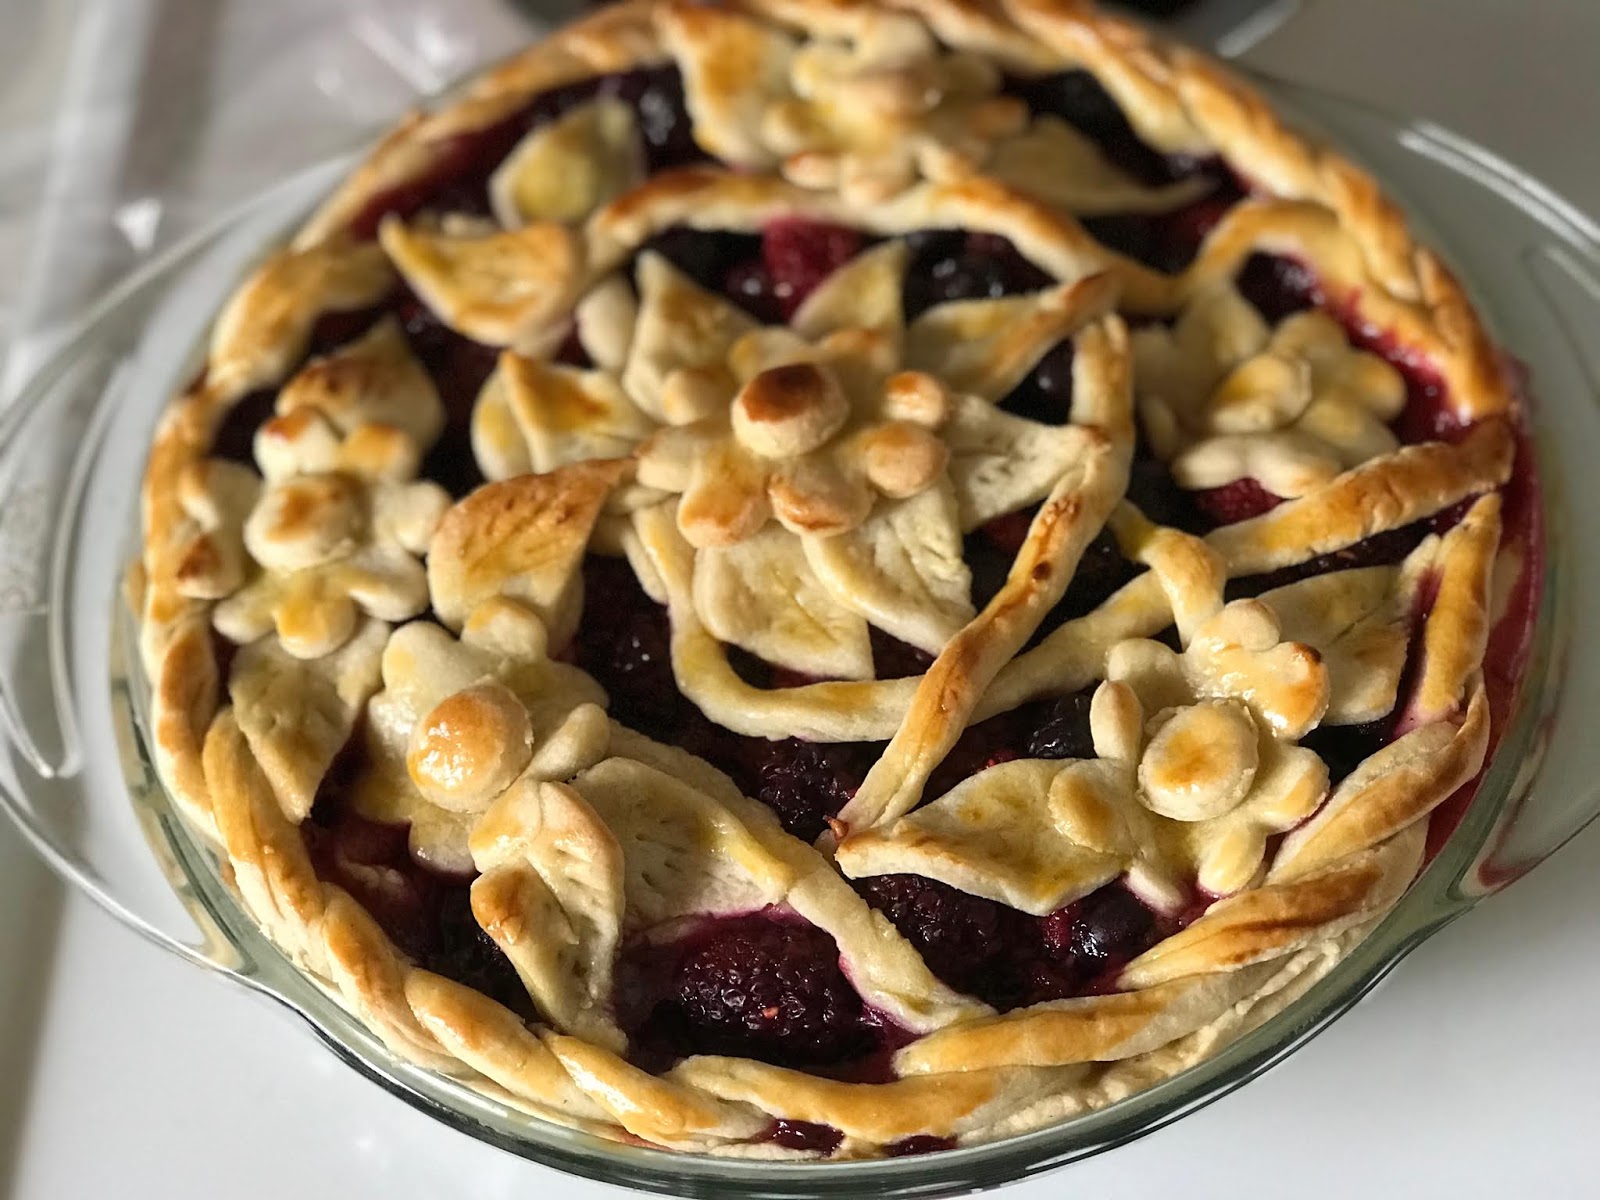
I had never made a pie from scratch before, so I decided I wanted to add that to my dessert list. Why add more work? I feel like I needed to experience making a pie from scratch. Try something new. See if I was good at it. So I picked this recipe. I'm glad I did. Not only was it delicious, but it was also beautiful. I'm all about presentation so... I was happy with it.
Triple Berry Pie:
For the crust:
2 1/2 cups all-purpose flour
1 tsp salt
2 Tbsp granulated white sugar
1 cup unsalted butter, cold and cut into small pieces
1/4 - 1/2 cup ice water
1 egg, separated
1 Tbsp, heavy whipping cream
For the Filling:
5-6 cups mixed berries (I used blackberries, blueberries, and was[berries)
1/2 - 2/3 cup granulated white sugar (depending on your desired sweetness)
1/4 cup tapioca starch OR corn starch
1 tsp ground cinnamon
Directions:
Combine flour, sugar, and salt in a food processor (or bowl, if that is what you have to work with). Add butter and pulse to combine until resembles course crumbs, about 10 to 15 seconds (if using bowl, cut the butter in with a pastry blender). Add ice water in a steady stream, starting with just 1/4 cup. Process just until the dough pinches together. If necessary add a little more water until you get to this state. You should not need more than 1/2 cup nor require longer than 30 seconds processing. Turn the dough out onto your work surface and divide in half. Shape into flattened discs, wrap each into plastic wrap and refrigerate for 1 hour.
Take one disc and roll it out onto your floured work surface until about 12" in diameter. Roll from the center out and rotate your crust quarter turns occasionally to avoid sticking. Transfer the crust to a 9" pie pan. (To transfer, I gently fold the dough into quarters and unfold in the pan). Trim the edges, leaving about 1/2" overhang and then fold them under. Cover with plastic wrap, and place in the refrigerator for about 30 minutes.
Repeat process with second disc. Cut about 3 to 5 long, this pieces from the middle. Transfer to a parchment paper-lined cookie sheet. Gently pinch each piece all along the length, and then roll so it is rope like. Using a small flower-shaped cookie cutter, cut out and transfer about 7 flowers to the cookie sheet. With the remaining dough, use an almond shaped cookie cutter to obtain as many pieces as you can. From the scraps, cut out small circles that will be the center of your flowers. To finish off the leaves, use a knife or clean razor blade to lightly etch "leaf lines" into each almond-shaped dough piece. Cover with plastic wrap, and place in the refrigerator for about 30 minutes.
For the filling, rinse and dry the berries. Place them in a large mixing bowl, and stir in the remaining ingredients until uniformly coated. Remove the bottom crust from the refrigerator. Use a pastry brush to apply a thin layer of egg white to the botton. Pour the filling into the crust-lined pie pan, and level with a spoon.
Whisk together the yolk and cream. Brush a thin layer around the edge of the crust.
Remove the crust flowers, vines and leaves from the refrigerator and let sit for a couple of minutes. Start by putting down one long piece of rope-like dough across the top of the berry filling in a loopy, simple way (like an S shape). Just make sure each end overlaps the bottom crust edges. Lay down the other rope-like pieces as branch offs, keeping the design simple and loopy. Cut down the lengths of the dough rope as it suits you. Don't worry about bad branch connections or cracking/ breaking pieces; you can always cover them up with leaves. once you are satisfied with the general vine shape, brush a thin layer of the yolk-cream mixture over it.
As you finish decorating from this point, apply the yolk-cream mixture on the tops of each piece as you go. Use a little on the undersides of those that do not want to stay (especially the center of the flowers to their petals) it'll work like paste.
Whenever you want to designate as the top of your pie, that is where you will place a flower. First place a leaf lightly down on either side. Place a flower down between them, slightly covering the inner corners or the leaves. Place several more leaves around the edge. You will have to raise the previous leaf slightly and slide the new one under. You can place as many around the edge as you want. I did not go all the way around but left a few inches opposite the flower uncovered.
Please as many leaves as desired hanging off the vine branches. You do not need to pinch these down, just gently place each where you want them. Place your flowers where ever loks good to you. Overlapping a leaf or two looks nice.
Place the pie in the refrigerator for about 30 minutes. In the meantime, preheat the oven to 375 degrees.
Place the pie in the oven on top of a cookie sheet. At about 10 to 15 minutes into baking, place an aluminum foil ring over the pie edges to prevent them from burning. Continue baking for another 35 to 40 minutes or until the top is golden brown. Serve warm or at room temperature.